Block 22
Yes, we're skipping Block 21, you didn't miss one. I could have gone back and renumbered everything, but I'm lazy. So we're skipping the lone star for now, otherwise you'll probably never get another block. So, here we go. We will continue on with applique, in this case Orange Peels. There are many ways of doing applique, we'll focus on rough edge, machine-sewn applique. But I'll provide links to a few other ways as well.
Queen Sized:Background: (8) 4.5" x 4.5"
Prints: enough to make (8) 4" petals
I used some leftover HSTs for (4) of the background squares, and cut (4) white ones as well. The red and green are fabric for the petals.
Baby Quilt:
Background: (8) 2.5" x 2.5" OR (2) 4.5" x 4.5"
Prints: enough to make (8) 2" petals or (2) 4" petals
Piecing Instructions
Print either the Orange Peel Template which has both one 4" and one 2" petal, or a page of 4" Orange Peels, or a page of 2" Orange Peels. Make sure your printer is set to "Actual Size" and use the 1 inch measure to make sure it came out the right size. If you are following along with me, using rough edge applique, cut out the 4" (2") orange peel template and then trace it onto template plastic and cut that out.
There are several other types of applique. You can use needle turn applique, freezer paper applique (you can trim your freezer paper to 8.5x11" and print the full page of orange peels directly onto the paper), and fusible applique (we'll be returning to this method for our Dresden plates).
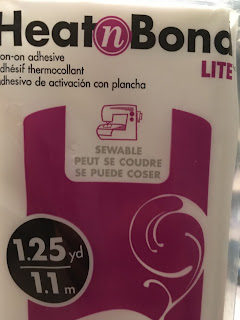
For the raw edge applique, I prefer to use the Lite Heat n Bond (make sure it's light weight and sewable). It has a bumpy side and a paper side.
Turn the interfacing so the paper side is up, and using your template draw as many orange peels as you need on it. Now cut around the shapes leaving at least a little bit extra all the way around (do NOT cut on the line yet). For larger pieces, I would recommend cutting the center out of your shapes, but these are fairly small.
Put the shapes paper side up (glue side/bumpy side down) on the wrong side of the prints. If you'd like to fussy cut your peels, hold the fabric and peels up to a light source and move the interfacing until you are satisfied with the results. Follow the pressing instructions on your interfacing carefully (too short and your interfacing won't adhere, too long and your glue will start to pull away).
Now take a ruler and measure in 1/4" from each creased corner, and make a small dot with a removable pen/pencil/chalk pen. I used my Frixion pen, because it disappears with heat.
Now take your background fabric and your peels over to your ironing board and peel the paper off the back of the petals. Carefully position a peel on the background so that the two corners are touching the dots you made and the peel lies along the crease. Again following the pressing instructions for your interfacing, press the peels onto the background fabric. Do this until all of your peels are adhered to a background square.
Take your squares to your sewing machine. You can match your thread to your fabric, but I piece, quilt and bind with white, so I don't bother. My sewing machine is straight stitch only, so I had to use that. But if your machine does zig zag or blanket stitch, those are good options as well. I like using a fairly wide zig zag with a narrow repeat. Make sure you have a decent sized thread tail pulled back behind the presser foot (both top and bobbin thread).
If you are using straight stitch, start slightly on the fabric about 1/8" from each edge (for anything else start in one corner). Sew about 1/8" from the edge all the way around, stopping your needle shortly before the other corner, lifting your presser foot, and turning the square. Carefully sew the last stitch through your first stitch, then lift your presser foot, pull up a tail of thread and cut it. Make sure you leave enough to start your next block with a tail.
Take a needle, thread the top two threads through and pull the tails through the hole made by the first and last stitch. Take all four threads on the back of the block and knot it as close to hole you pulled the top threads through as possible. Trim the excess thread about 1" from the knot.
Once you have all of your blocks finished, arrange them any way you like. If you have (8) blocks, there are a ton of options, X's, O's, waves, leaves, etc. You have a few less if you are working with only (2) blocks.
Once you are satisfied with your layout, sew the blocks together and press.
Here is the finished queen sized block:
And the finished baby quilt block (I used the (2) 4.5" squares and 4" petals):
Completed block size:
Queen sized: 8.5" x 16.5"
Baby quilt: 4.5" x 8.5"
Several other options:
- Switch out your background and print fabrics, so you have an inverted peel.
- Cut wonky orange peels to applique to your background.
- Use HSTs as the background (you'll get a cathedral window effect if you use the O layout).
- Fussy cut your orange peels.
- Cut a background the size of the finished block and applique the orange peels any which way.
- Create fabric and cut your peels from that.
- Leave some of the background blocks empty.
- Cut any other vaguely directional piece to applique, like a simple arrow.
- Use some of your scraps and make each peel from a different fabric.


No comments:
Post a Comment