

Block 13

We're moving on to the Disappearing 9-patch. First of our sew and slice blocks. This is a very quick and fun block to make, so enjoy!
Cutting Instructions

Here the print on the white background is my Background/Print 1, the green is my Print 2, and the red is my Print 3.


Sew your 9 patch together, pressing as preferred. Remember to pin!


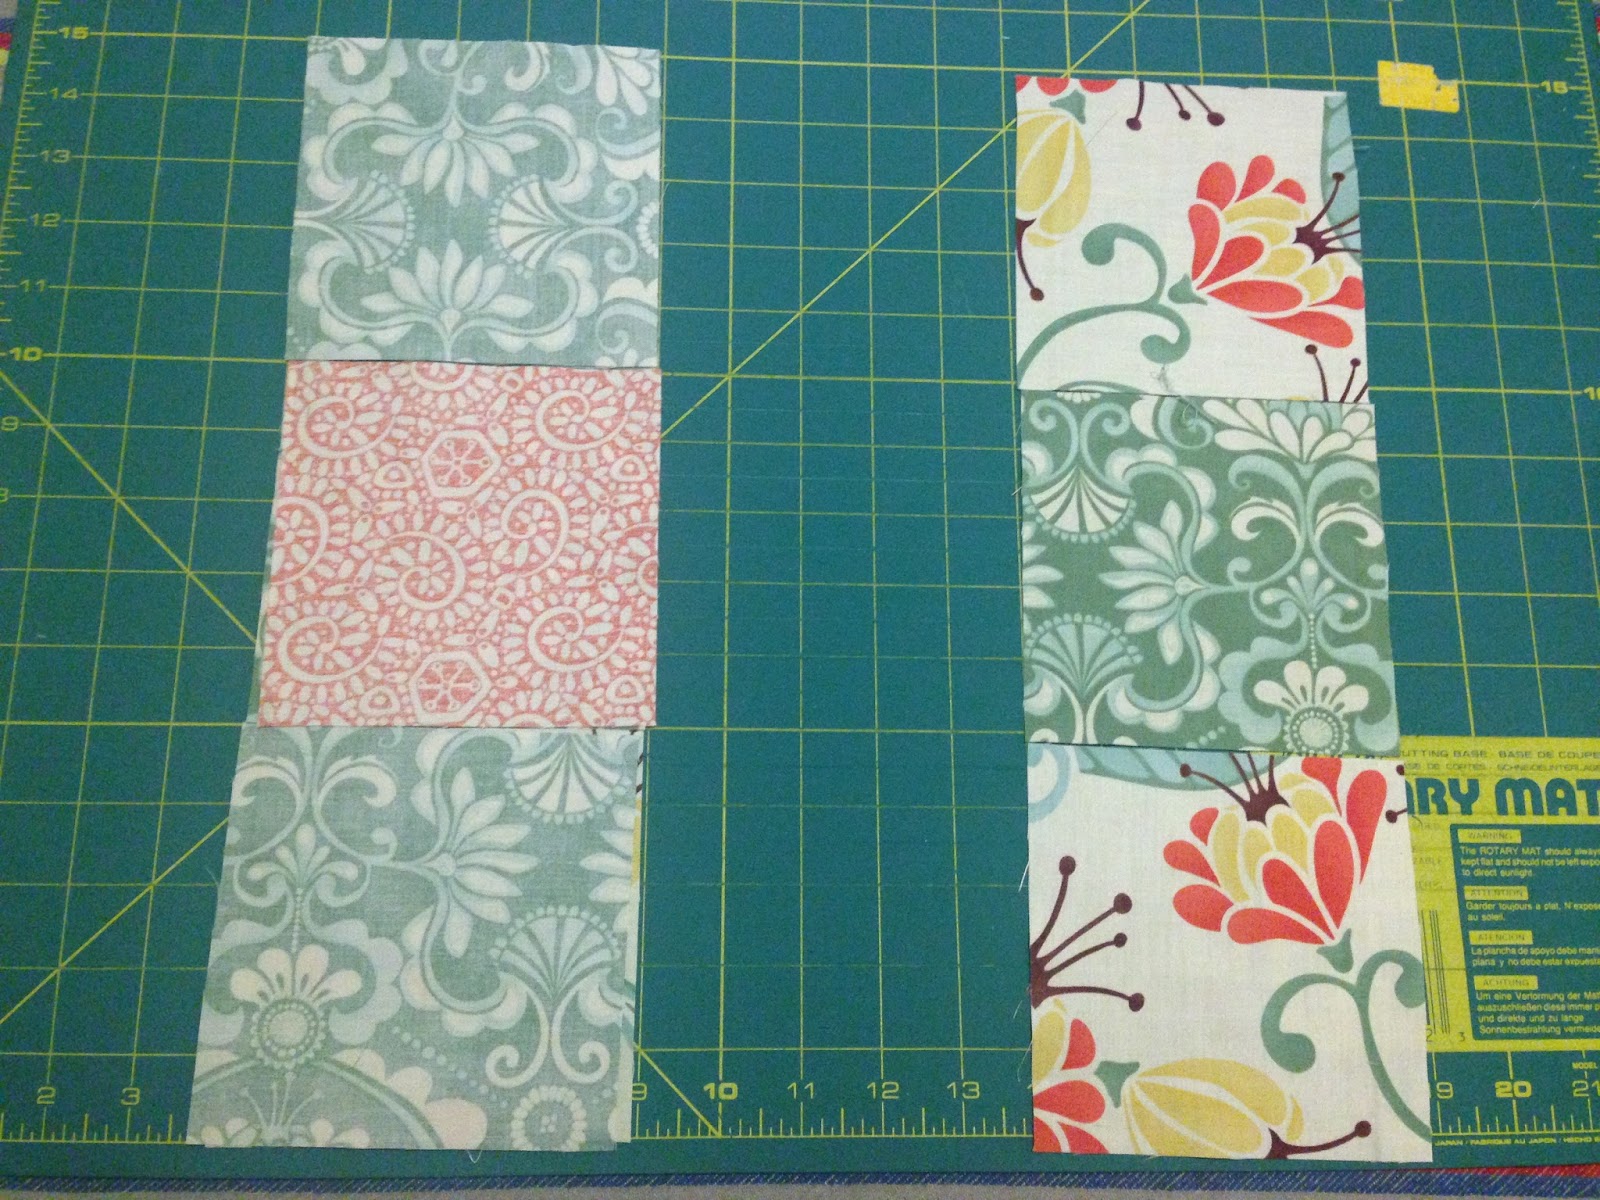
Now unfold your block and take it to your cutting mat. Take your ruler and line it up on the horizontal center line, making sure to line it up with the creases on both sides. Or if you are confident about your seam allowances, measure 2.25" from one of the long seams. Cut the block in half along the center line, being very careful not to shift the ruler.

Now WITHOUT moving the block, take your ruler and line it up along the vertical center, again making sure your ruler lines up with the creases you made or 2.25" from the seam. Cut along the line.

Now, trim each of the quarters individually to 6.5" (3.5") square. Line up the 6.5" (3.5") lines at the center corner (Print 3) and trim from the background/Print 1 square and Print 2 rectangles.

Now arrange your units into the new layout and sew the block together. Here is the finished queen sized block:

Here is the finished baby quilt block:

Completed block sizes
Queen sized: 12.5"x12.5"
Baby quilt: 6.5"x6.5"
Several other options:
And again, just for fun, some quilt designs for this block:


Happy sewing!
Queen Sized:
Background/Print 1: (4) 5"x5"
Print 2: (4) 5"x5"
Print 3: (1) 5"x5"

Here the print on the white background is my Background/Print 1, the green is my Print 2, and the red is my Print 3.
Baby Quilt:
Background/Print 1: (4) 3"x3"
Print 2: (4) 3"x3"
Print 3: (1) 3"x3"

Here the bicycles are Background/Print 1, the brown is Print 2, and the yellow is Print 3.
Piecing Instructions
Lay out your blocks in a 9 patch, with the Background/Print 1 in the corners, the Print 2 in between, and Print 3 in the center.

Sew your 9 patch together, pressing as preferred. Remember to pin!


Once your 9 patch is complete, fold it in half top to bottom and side to side and press a tiny crease top and bottom and on both sides. You do not need to press the crease all the way across. Note: You can skip this step, if you are confident in your block size/seam allowances.


Now unfold your block and take it to your cutting mat. Take your ruler and line it up on the horizontal center line, making sure to line it up with the creases on both sides. Or if you are confident about your seam allowances, measure 2.25" from one of the long seams. Cut the block in half along the center line, being very careful not to shift the ruler.

Now WITHOUT moving the block, take your ruler and line it up along the vertical center, again making sure your ruler lines up with the creases you made or 2.25" from the seam. Cut along the line.

Now, trim each of the quarters individually to 6.5" (3.5") square. Line up the 6.5" (3.5") lines at the center corner (Print 3) and trim from the background/Print 1 square and Print 2 rectangles.

Now arrange your units into the new layout and sew the block together. Here is the finished queen sized block:

Here is the finished baby quilt block:

Completed block sizes
Queen sized: 12.5"x12.5"
Baby quilt: 6.5"x6.5"
Several other options:
- Make it scrappy, pick a color way instead of single print 2 and cut (4) pieces, (1) from each print.
- Make it wonky. As long as your units measure 6.5" (3.5") before you sew them into the finished block, you'll be fine. Cut the pieces a bit larger and/or not square and cut 6.5" (3.5") pieces from it at will.
- Play with the layout of the corner units and see what designs you can come up with.
- Turn the center pieces into HSTs in the finished block by starting with a 5" (3") snowball unit in the center.


Happy sewing!
No comments:
Post a Comment